
Main Objective.
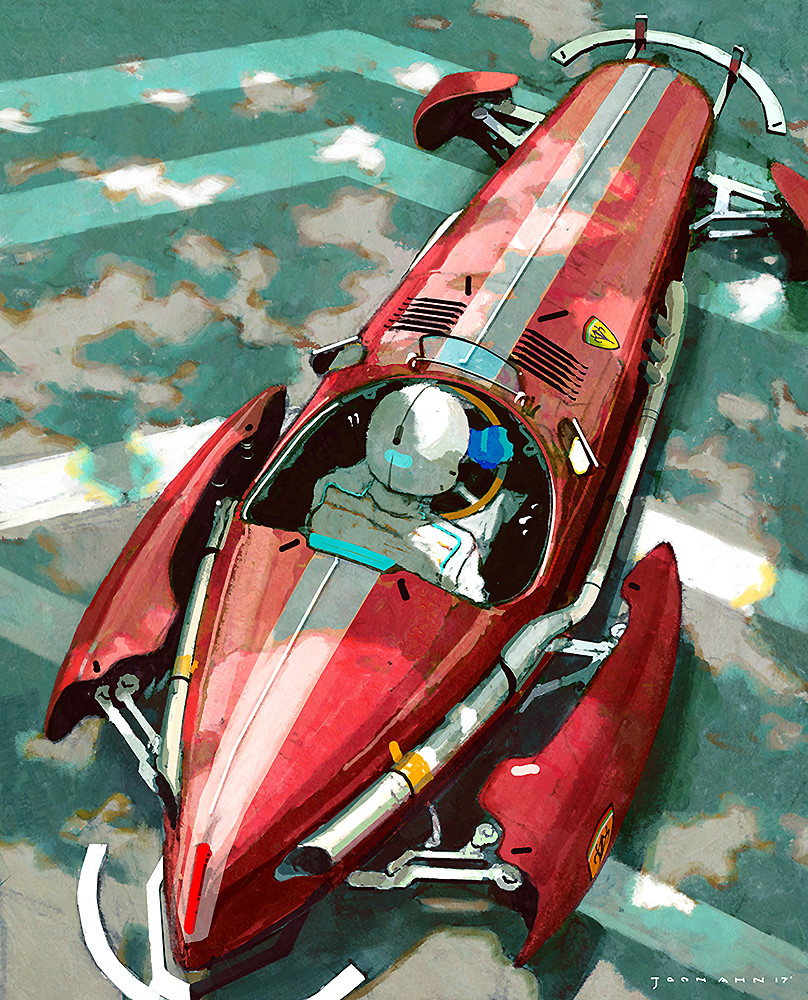
When starting this project, my main objective was to recreate the concept artwork by Joon Ahn in a 3D environment as a realistic asset. The hover car from Ahn caught my eye for its colors, unique design, and possible ability to be used in plenty of environments and sets. My planned workflow is to start collecting reference photos with PureRef (my app of choice for collecting reference images). For the start of modeling and unwrapping the car, I used the software 3Ds Max. I am comfortable with my knowledge and speed modeling in this program, so I concluded that if I wanted the car to be modeled to the best of my abilities, it would start from there.
The surfacing of the hovercar would be done in Substance Painter due to its intuitiveness and my prior knowledge. To keep a certain level of detail in the texture for the asset, I want to have the final asset have around 3-5 texture sets, dividing the pieces between multiple detailed 4K sets. I plan to do this instead of using one texture set because it allows for more pixels to be utilized in one asset. Alongside that, it allows for more leeway in tweaking a certain asset without it wholly affecting the Unwrap of every other unwrapped asset. One thing I noticed while making the One Wheeled Tank was that I did inevitably have to return to the modeling/unwrapping step for minor changes, and having them in separate texture sets allowed me to sort through and make those corrections with much less of a negative ripple effect.
What to take note of.
Prep Work
Before starting in 3Ds Max, I collected a plethora of photos ranging from other hovercar concept art to 3d renders. I utilised this to help build a better mental image of how I wanted the textures and future Arnold rendering to turn out. Due to the source concept photo being one isometric beauty render from Joon Ahn, it allows some leeway for my interpretation of unseen angles. To help flush this out I also gathered references for various car parts and pieces in styles I found worked for the future car.
Starting the Modeling
When starting the modeling for the hovercar, I started with a rectangular prism and built up detail from there. My main aim starting was to make the shape of the car close in dimensions to the concept art; building off of a vastly inaccurate main body would only invite more problems later on. The biggest part of the modeling I looked forward to while working was the cockpit, which had little detail in the concept art outside of a tanned steering wheel. This inspired me to have the cockpit have more of a retro/steampunk style (check out the PureRef to see references), and in turn, more dials, switches, and buttons were added along with making it a manual transmission.
Surfacing the car
Surfacing the hovercar in Substance Painter was rather enjoyable, especially seeing it all come together to closely resemble the imagined final product. As I noted earlier, there were a few times I did have to return to 3Ds Max to make some minor changes in the unwrap that I may have missed. The hovercar was separated into four texture sets: the main metal body, the cockpit, metals and pipes, and miscellaneous. Due to this, the changes that needed to be corrected throughout the surfacing stage resulted in only small fixes needed when returning to Substance Painter.
The main aim while texturing was to keep the car looking very simple in the colours being presented reminiscent of the various other 3d reference photos I collected. While keeping this in mind I wanted it to be something able to be composited in real life so I had to add a certain level of detail and wear. To keep the number of additional colours low I focused on using the roughness and metalness maps to add variation to surfaces like the paint and metals as you would expect on a real race-worn car.

Final Maya Render
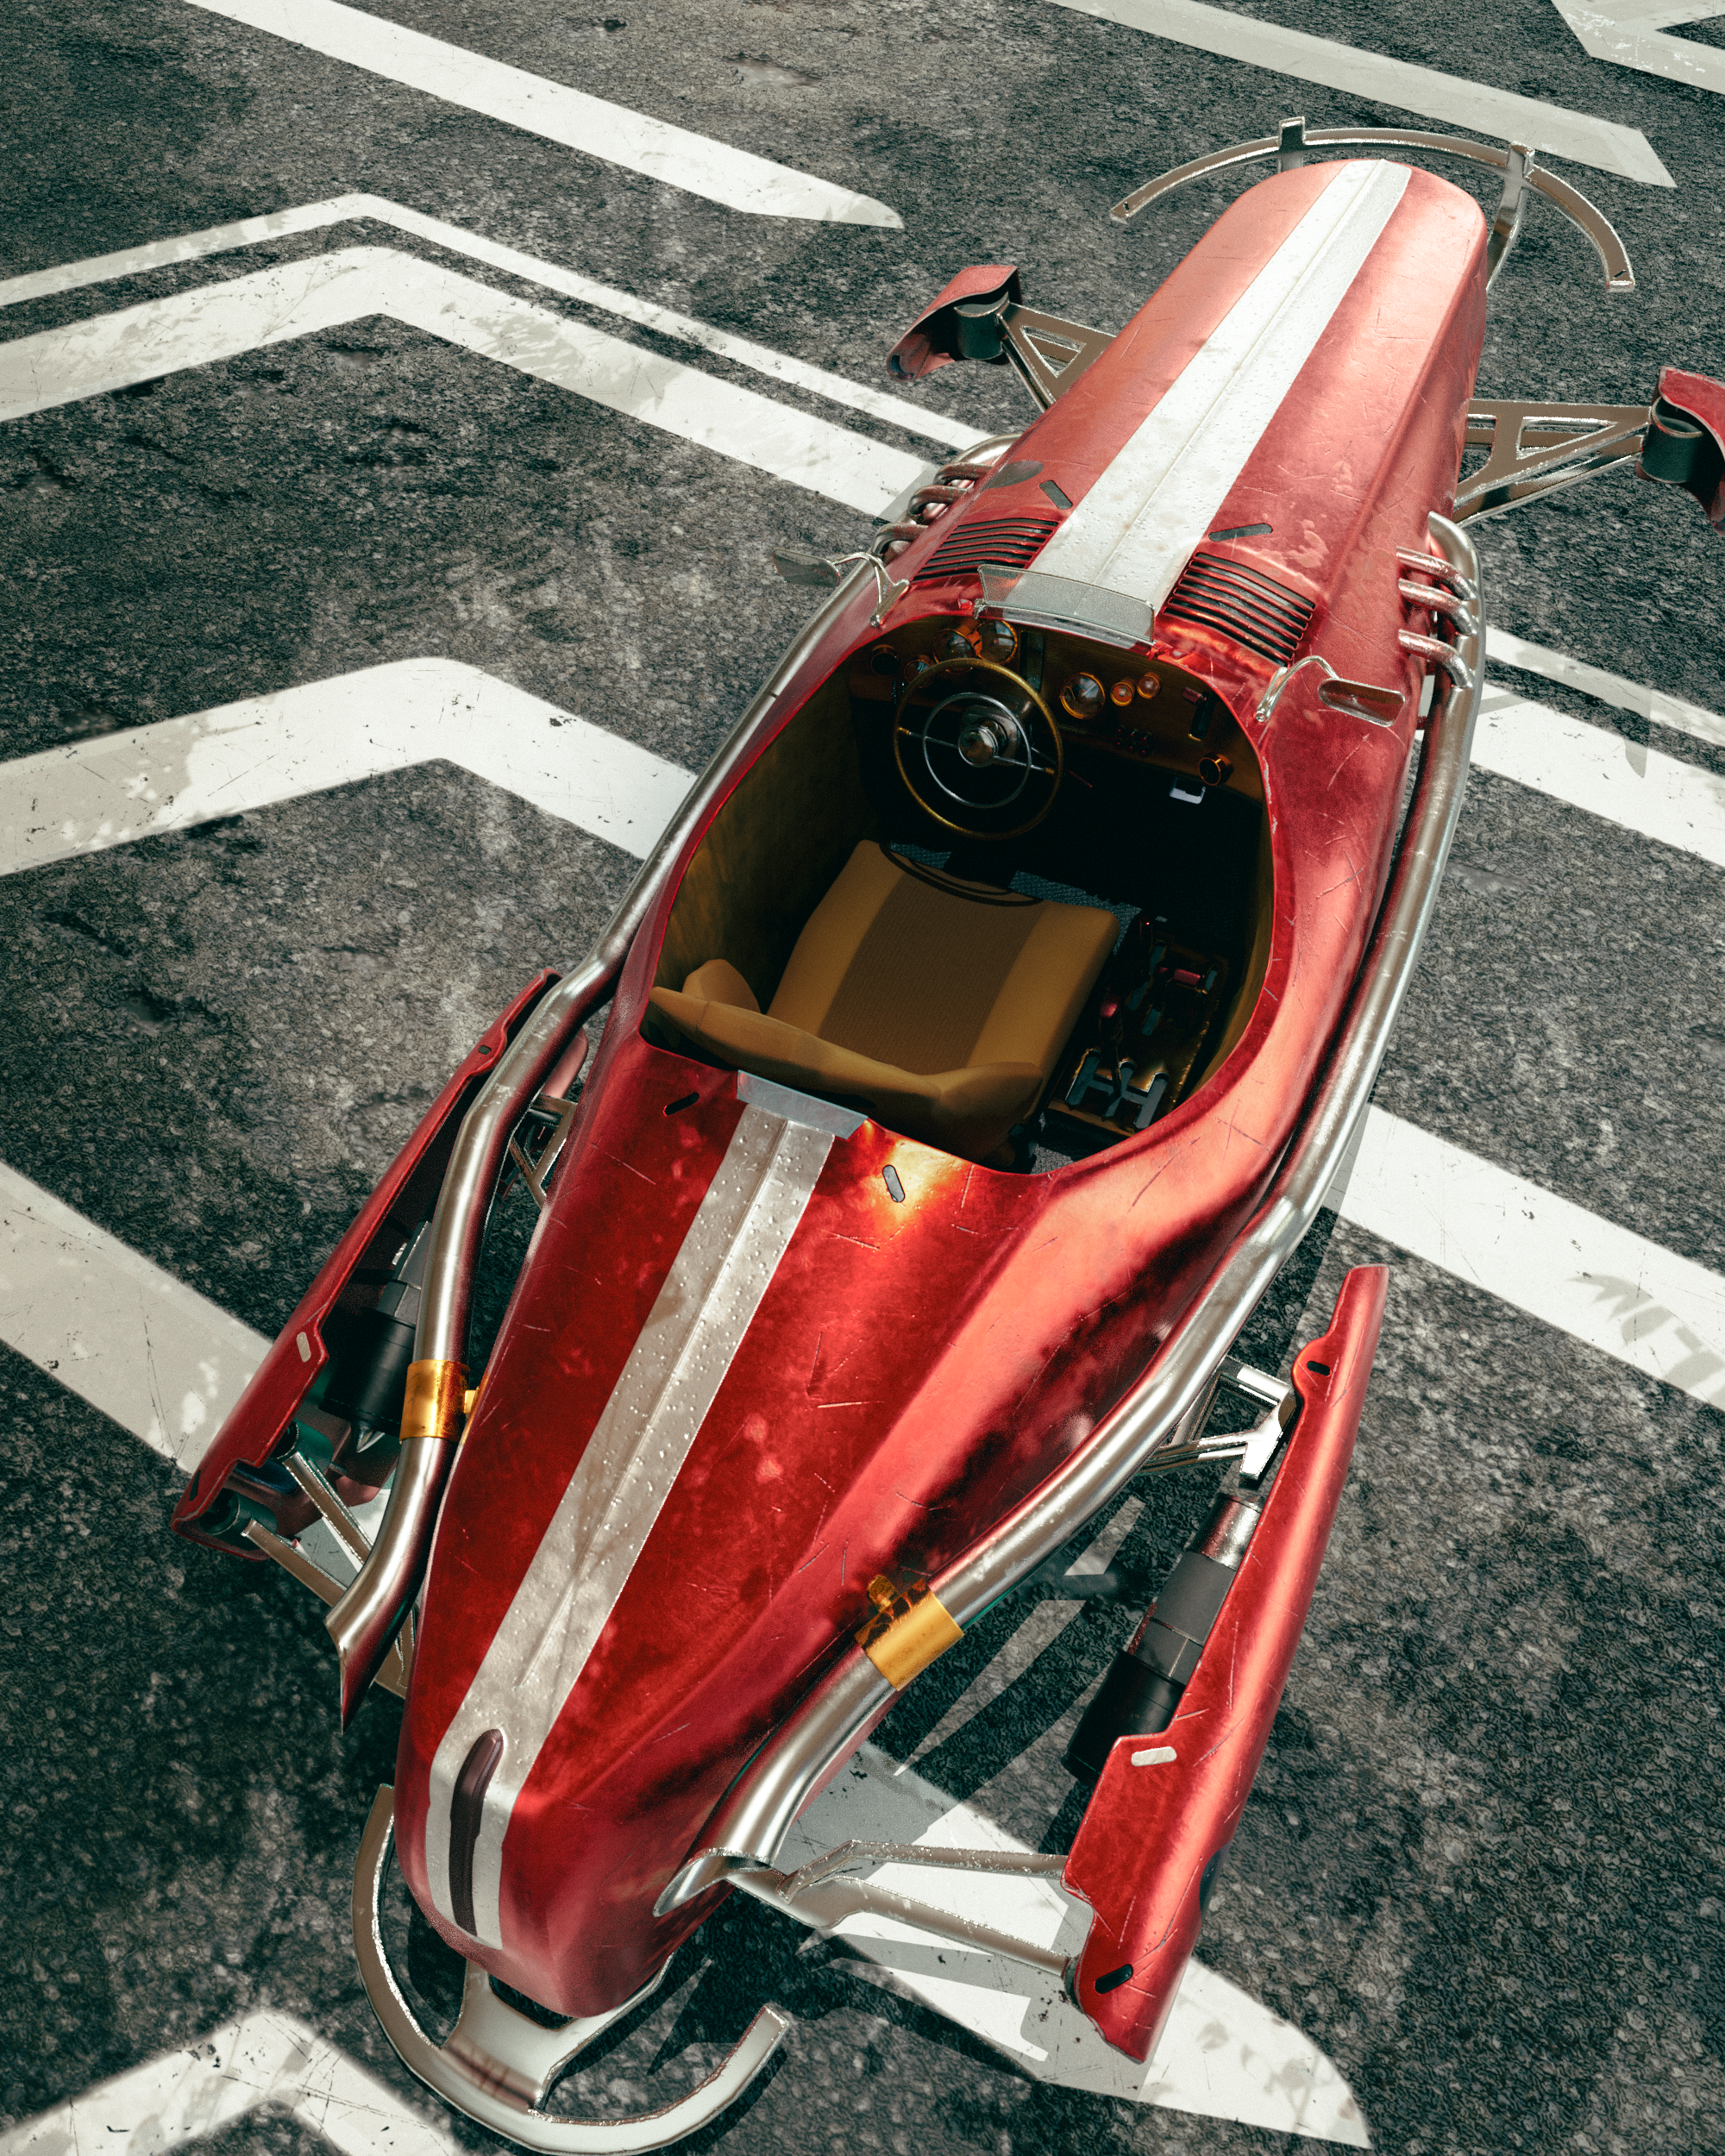
For rendering the beauty turnaround I utilised Maya and Arnold renderer. I aimed to have the hovercar on a similar pedestal to the One Wheeled Tank, though I wanted it to have its uniqueness and story to it. My answer to this was to have it look like the car is racing away from lasers and through some debris. I wanted to keep a low level of debris action so I referenced two pieces from the tank to give the idea of it being from the same “universe”. I also created a few capsule mesh lights to act as lasers and a tertiary source of light for more occluded angles. Alongside the laser mesh lights, I used one of my favourite HDRIs as the main skydome to give the overarching lighting to the scene (replicates real locations lighting in your scene). I also chose to use a secondary set of area lights to add purple and blue rim lights and illuminate the cockpit a bit better. Finally, to give an extra flare to the hovercar I made the engine fans glow alongside the back brake light.
To put the cherry on top I took the render sequence and took it through Camera Raw for colour corrections. This is my 3D Modeled Hovercar, concept art by Joon Ahn. The main programs used to bring this to fruition were PureRef, 3Ds Max, Substance Painter, Maya, Arnold Renderer, and Adobe Photoshop.
Frame Render - Turn Around
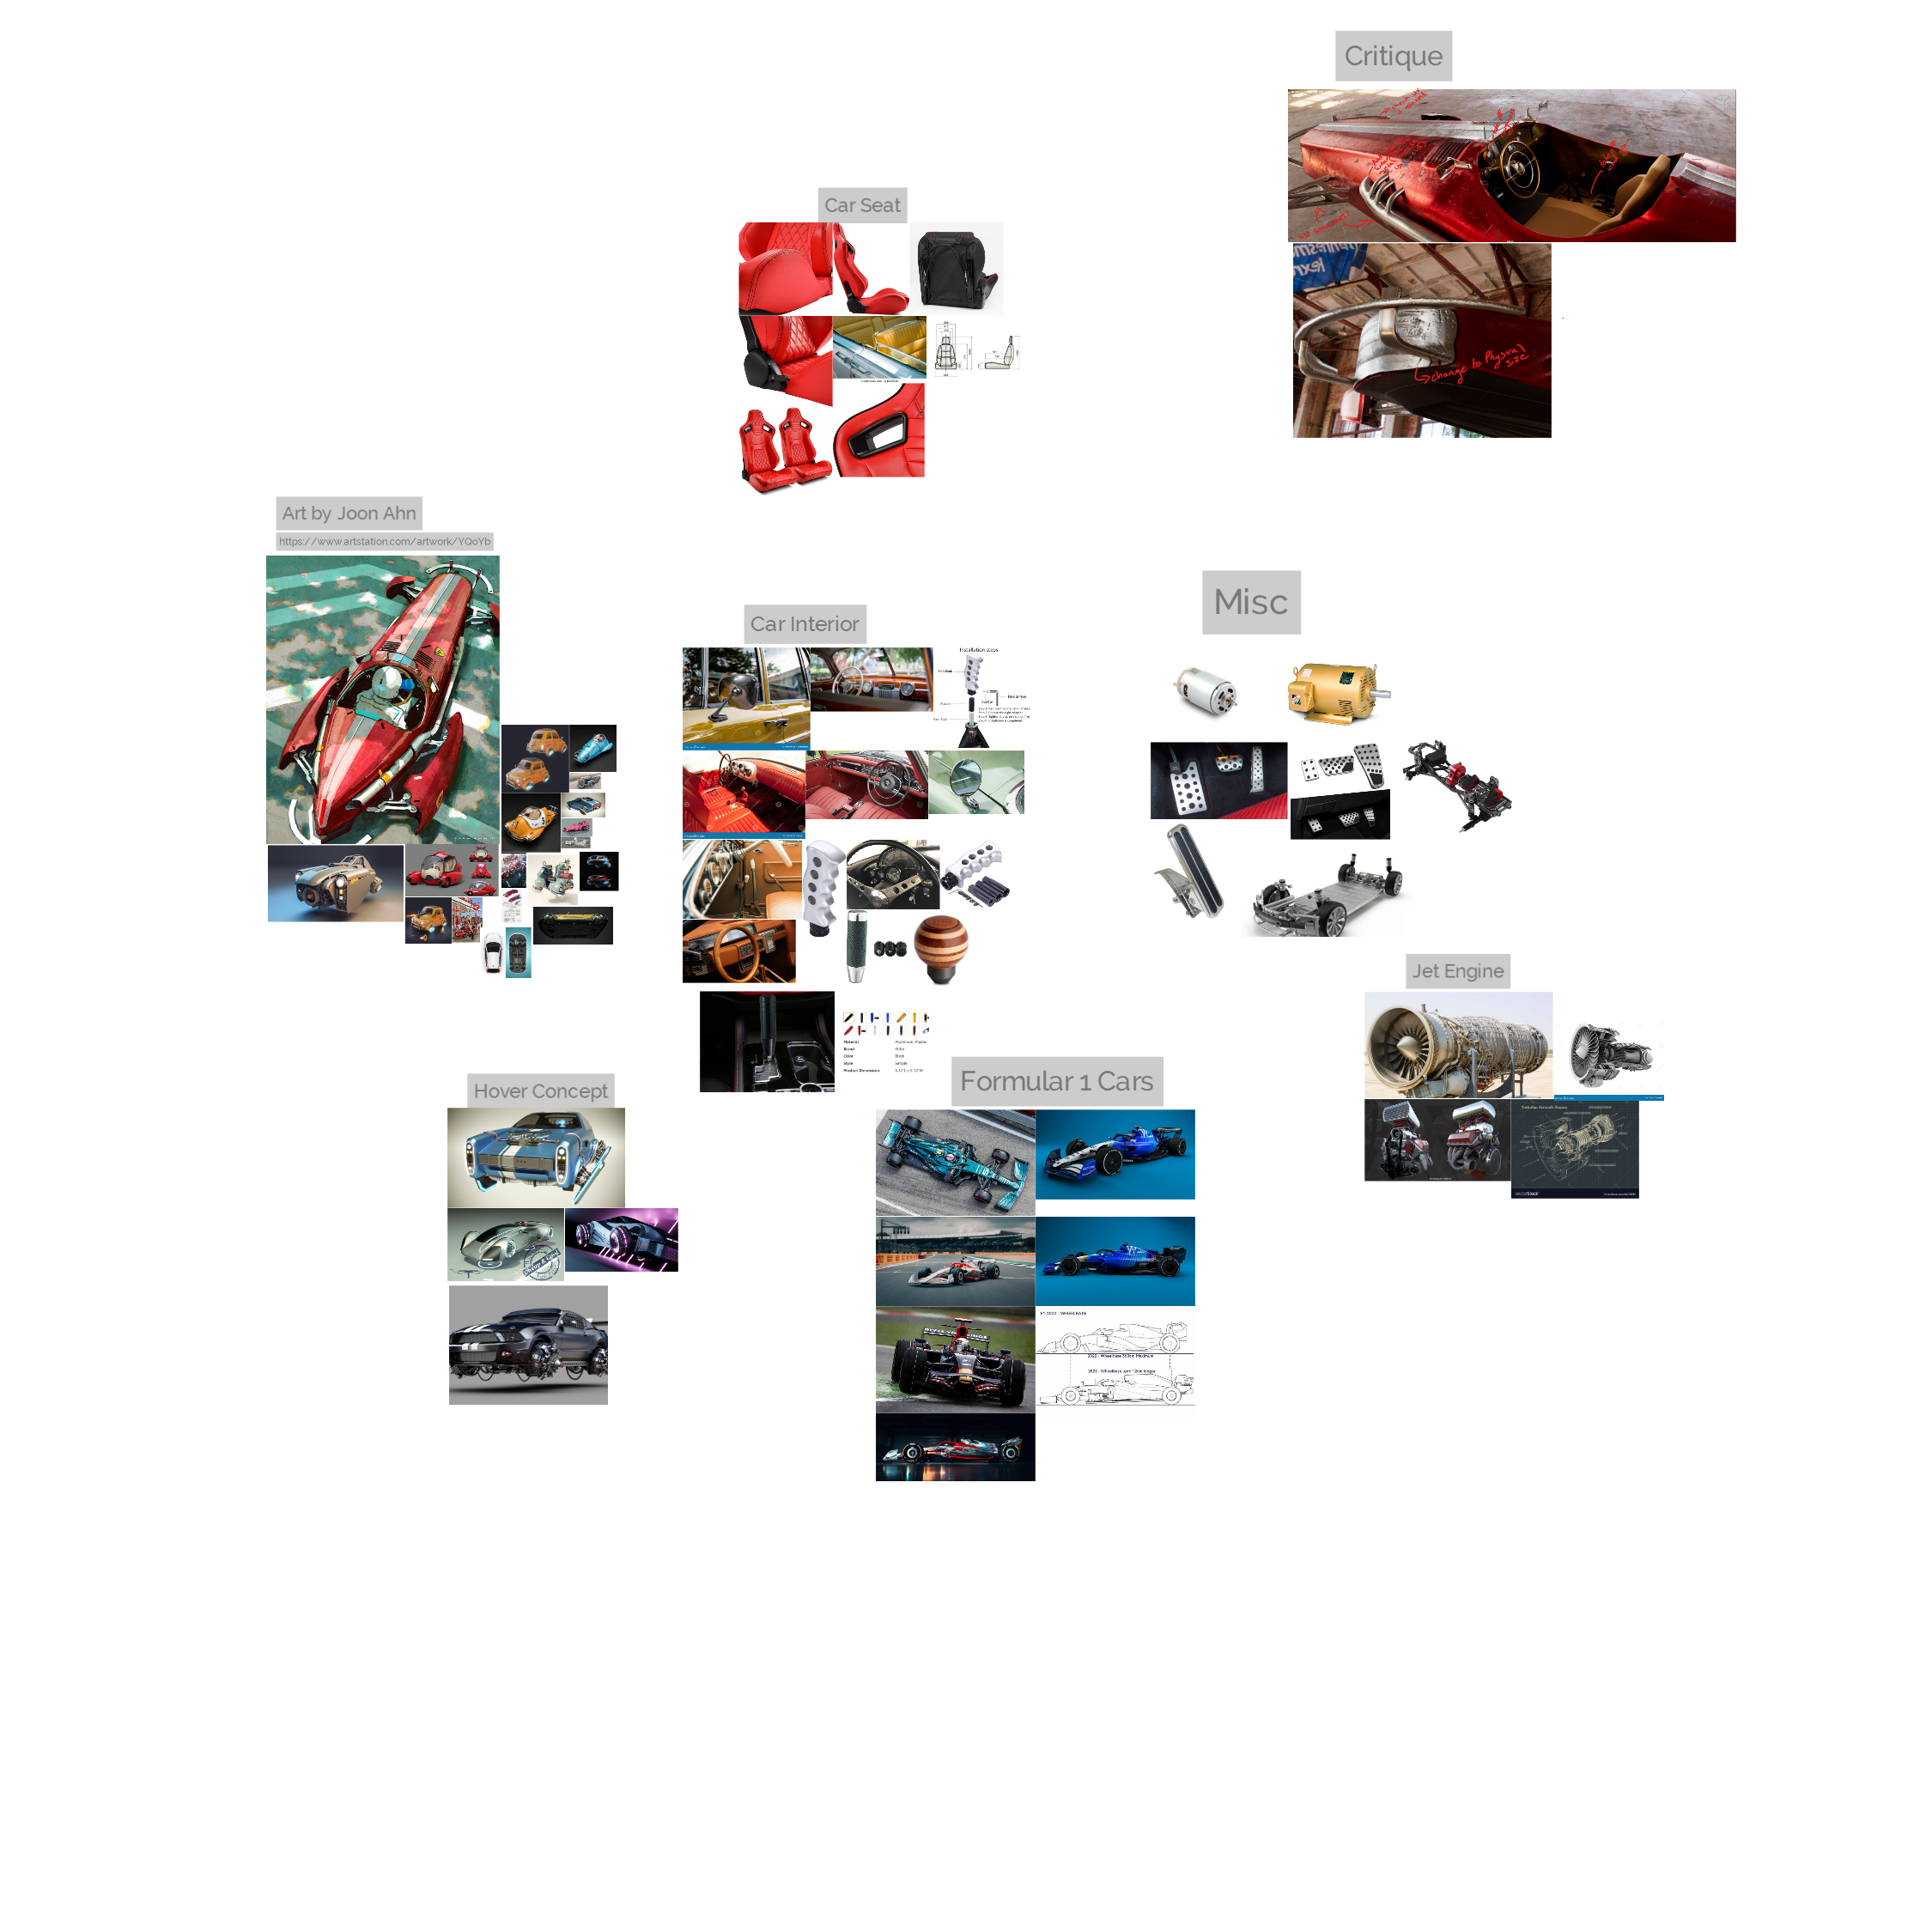
Hovercar PureRef
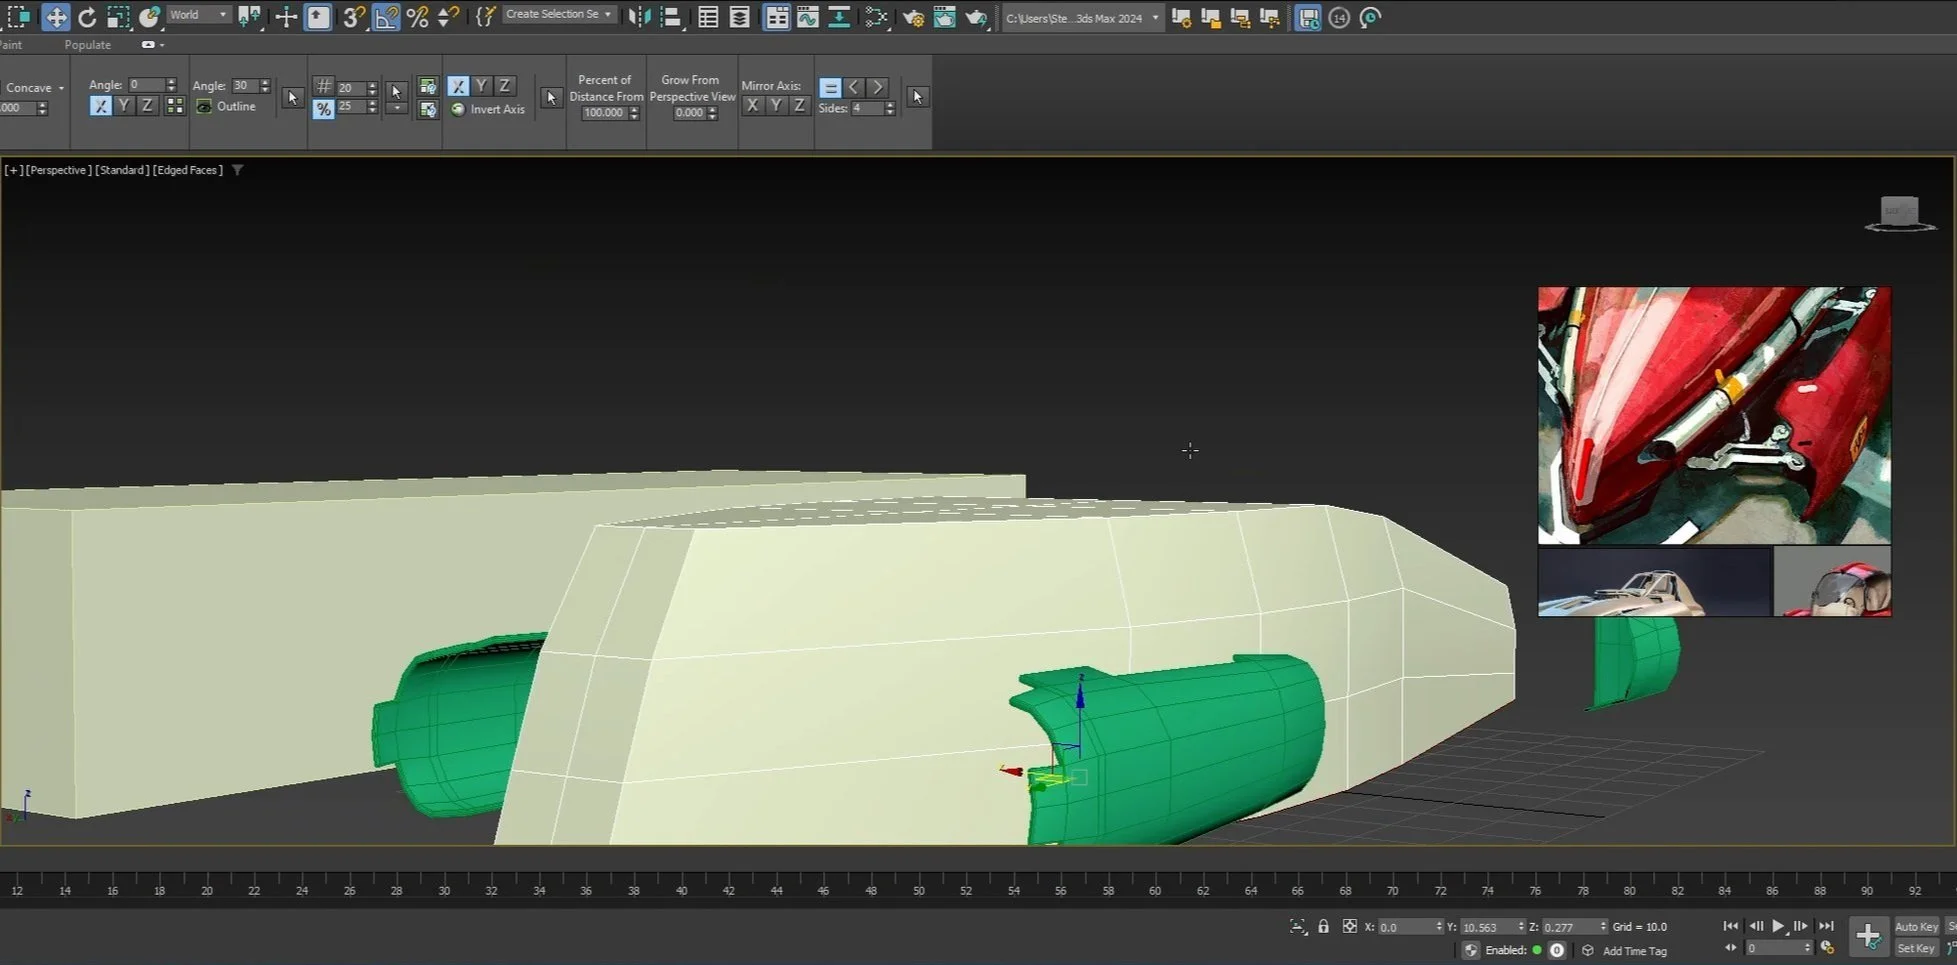
3Ds Max Model
Joon Ahn - Concept Art
Stevan Hutch - My Render
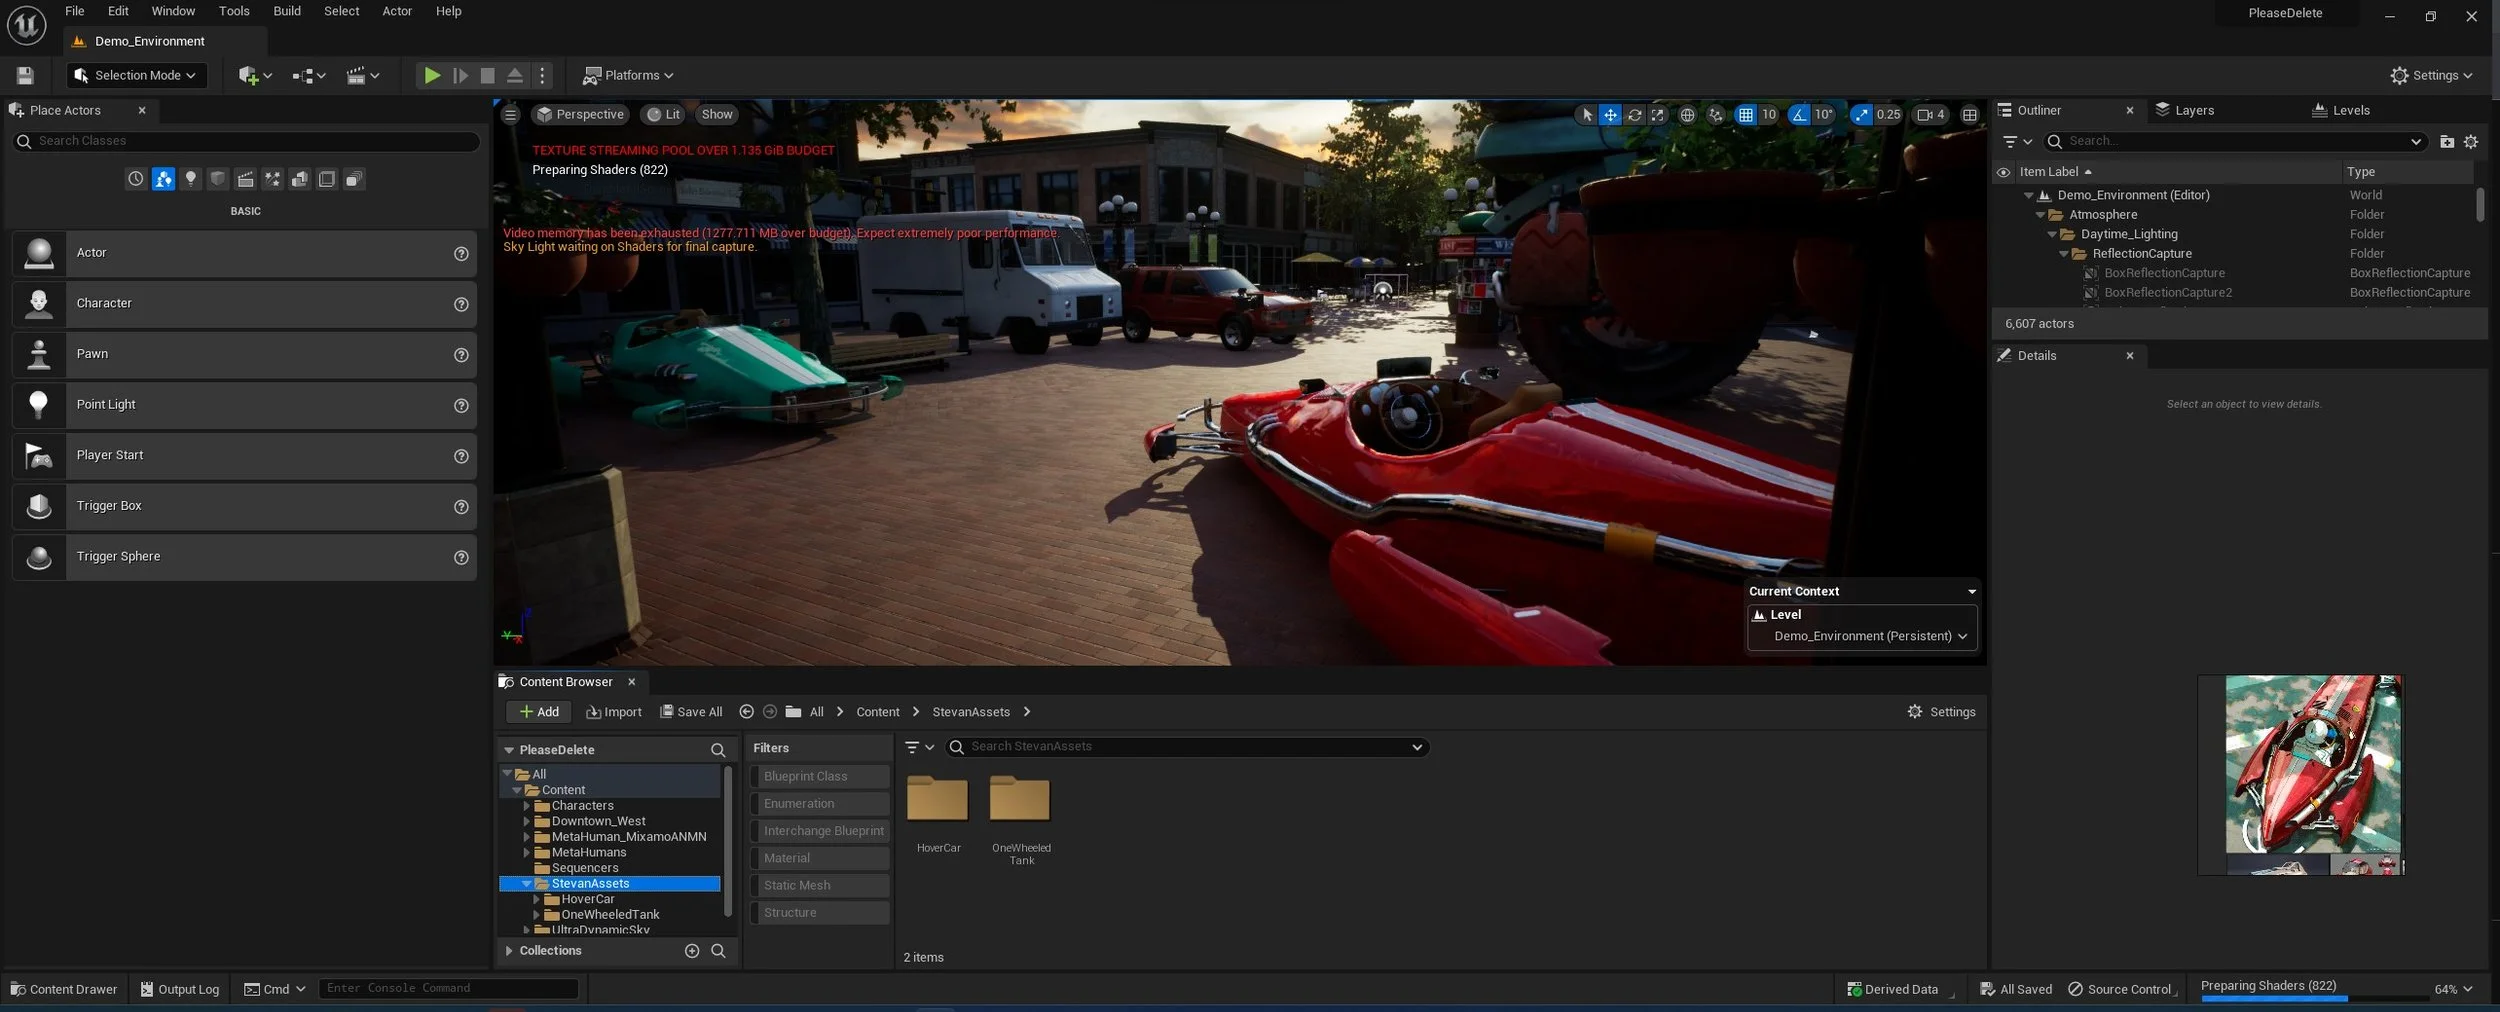
UE 5.2 - Scene